Wednesday, December 7, 2011

Card Share: Merry Tex-Mas

“Merry Tex-mas Card” 
Based off Card Sketch #14 by Allison Davis
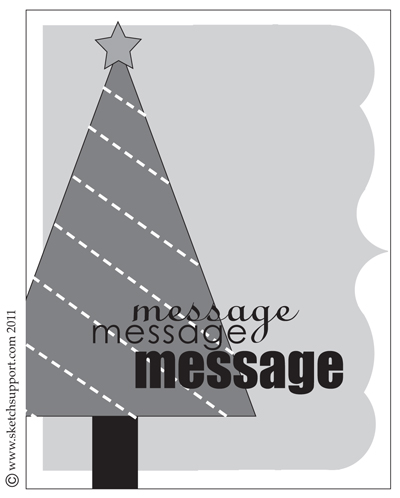
 Here is my card I created based off Allison's awesome sketch over at Sketch Support:

 Variation #1: Instead of using a Christmas tree as shown in the sketch, I stamped a snowflake swirl in the same general area on my card. I then heat embossed the swirl and added some diamond stickles to some of the stamped image.

Variation #2: My message was the focal point of my card instead of being just an accent. My snow globe stamp had both an image and the sentiment. I colored the image with copic markers, added some stickles glitter to the snow dots, and covered the glass globe area with glossy accents. I also added some red stickles to the holly berries.

Variation #3: Instead of using a decorative edge on my green pattern paper, I rounded the corners with the corner chomper punch.

Variation #4: Even though the sketch didn’t include borders, I added a ribbon and polka dot strip of paper at the bottom to help “ground” my stamped image. I added staples to the ends of the ribbon to attach it to the card.

Supplies Used—Cardstock: Bazzill (Red), Georgia Pacific (White);  Pattern Paper: Die Cuts With a View (The Green Stack), Rusty Pickle (Father Knows Best); Inks: Ranger Distress Inkpads (Gathered Twig, Iced Spruce, Evergreen Bough, Festive Berries), Tsukineko (Versamark, Memento: Tuxedo Black); Stamps: Inkadinkado (Snowflake Swirl), Texana Designs (Snow globe); Ribbon: Marcella by K& Company (Twill Stripe); Tools: WeR Memory Keepers (Corner Chomper), Tim Holtz (Tiny Attacher), Ranger (Foam Blending Tool), Close To My Heart (Heat Embossing Gun); Embellishments: Close To My Heart Embossing Powder (Heavenly Blue), Ranger Stickles (Diamond, Candy Cane); Markers: Copic Sketch (YG03, YG63, YG67, BG10, Y21, E33, E37, W1, W3, W5, R29, R39); Other: Ranger (Glossy Accents), Foam Squares. Card Sketch by Allison Davis (Sketch Support).

Monday, December 5, 2011

Layout Share: My Girl- Little Miss Independent

“My Girl: Little Miss Independent”
 
Variation #1: I only used the left side of the two page layout sketch, and I flipped the sketch so that my largest photo was on the left instead of the right. I used two 4x6” photos, two 4x4” photos and one 2x4” photo.

Variation #2: For my long title, I used two pre-printed stickers that said “My Girl” and the words “Little Miss Independent”. The stickers were mounted on a piece of turquoise cardstock. I stamped the swirl at the ends of the title for emphasis.

Variation #3: Since I only used one side of the layout sketch, I added my journaling in the blank space next to a photo. I added some sticker embellishments along with a button to help fill in the space.

Variation #4: For the accents that were included on the sketch, I substituted some of the tag stickers. The tag up near the title gave me the idea to cut the yellow flower tag sticker in half and use part of it near my journaling and the other piece above the title for my button and flower accents.

Supplies Used—Cardstock: Bazzill (Yellow), SEI (Turquoise, Pink);  Pattern Paper: SEI (Dill Blossom); Inks: Ranger Distress (Gathered Twig); Stamps: The Girls Paperie (Swirl Stamp); Stickers: Making Memories (Like It Is Diecut Stickers: Love), My Mind’s Eye (“Gertie” Girly Sticker Tags); Pens: EK Success (Zig Brown Writer); Tools: WeR Memory Keepers (Corner Chomper), Ranger (Foam Blending Tool), Martha Stewart (Cherish Border Punch); Other: Prima (Pink Flowers), Sandpaper, Cream Crochet Thread, Foam Squares.

Friday, December 2, 2011

Card Share: Gratitude

“Gratitude Card”


 Variation #1: I substituted smaller rectangles (stamped & punched) in place of the heart squares in the card sketch. I also stamped on the card base with some watermark ink for a tone-on-tone background.

Variation #2: My sentiment was stamped. The word “gratitude” was heat embossed with some tinsel powder and the words beneath it were stamped with dark brown ink.

Variation #3: I added a narrower piece of pattern paper under my rectangles and tied a ribbon in a knot just above the sentiment.

Other tips: I created the stamped rectangles by layering multiple stamped images. Some were stamped with full ink, some with second/third generation inking to create depth. I also layered several colors of ink with the stamps and also along the edges with the foam blending tool.

Supplies Used—Cardstock: DMD Inc. (Kraft), Georgia Pacific (White);  Pattern Paper: Daisy D’s (Yellow Gingham); Inks: Ranger Distress Inkpads (Gathered Twig, Rusty Hinge, Bundled Sage), Ranger Distress Stain (Antique Linen), Tsukineko (Versamark); Stamps: Technique Tuesday (Ali Edwards: Family Circle, Simply You, Loving Words), Inkadinkado (Leaf Swirl), Hampton Arts (Small Maple Leaf), Inque Boutique (Small Single Leaf), Autumn Leaves (Swirl); Ribbon: Close To My Heart (Cream Grosgrain); Tools: Tim Holtz (Tiny Attacher), Ranger (Foam Blending Tool), EK Success Punch (Photo Labels), Close To My Heart (Heat Tool); Other: Ranger Embossing Tinsel (Copper), Foam Squares.

Thursday, December 1, 2011

Layout Share: My Boy and His Furry Friend

“My Boy and his Furry Friend”


Variation #1: I substituted a photo in place of the journaling section on the layout; I just rearranged the layout to add my journaling in place of the left photo. I used two 4 x 5 ¼” photos and one 2 ½ x 4” photo.

Variation #2: Instead of using a long title, I used a pre-printed title card that said “My Boy” and I stamped the words “Furry” and “Friend”. The other words were handwritten.

Variation #3: I omitted the small journaling strips from the sketch and just added a date sticker on the lower right corner.

Variation #4: For the leaf accents that were included on the sketch, I substituted some homemade legos and stamped pawprints to go with my page theme. I created some hand stitched swirls to pull them all together. I also added some stitching along one of the thin strips below my photos. Along the other strip of paper, I added some stamped word borders.

Other tips: I sprayed the blue cardstock with some cream spray ink.

Supplies Used—Cardstock: ANW Crestwood (Deep Sea), Close To My Heart (White);  Pattern Paper: My Mind’s Eye (Life Stories: Blue Plaid, “Be Merry” Polka Dot/Cream), Memories in the Making (Window Check Navy); Inks: Ranger Distress (Gathered Twig), Ranger Distress Stain (Antique Linen), October Afternoon Color Mist (Buttermilk), Marvy Uchida (Black Marvy Matchables); Stamps: Technique Tuesday (Borderline: Family Ties), Stampabilities (Pawprint), EK Success (Antique Typewriter Alphas, “Friend” word stamp); Stickers: 7 Gypsies (Date Mini Label: Black), My Mind’s Eye (“Hattie” Boy Title), Deja Views (Family Journal Card); Pens: EK Success (Zig Black Writer); Tools: WeR Memory Keepers (Corner Chomper), Ranger (Foam Blending Tool), Making Memories (Paper Piercer); Other: Office Hole Punch, Sandpaper, Brown Crochet Thread, Foam Squares.