Wednesday, November 14, 2012

"Texas- Sized Christmas" Card

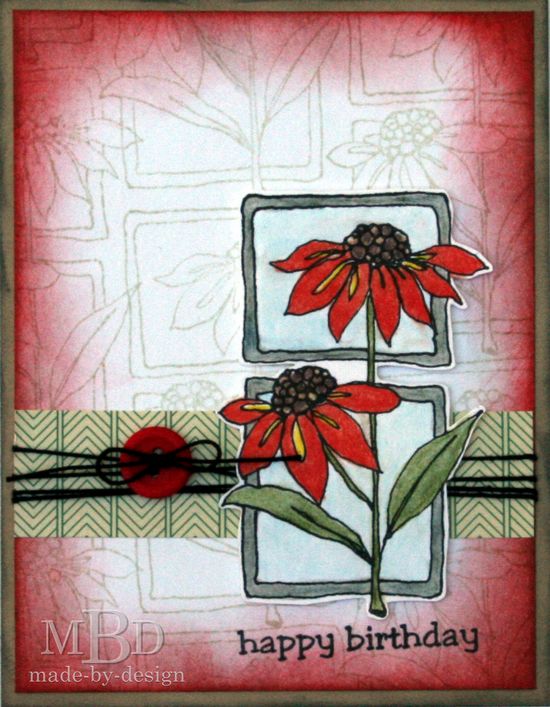
Here is my latest card creation using Texana Designs stamps. :)
To create this card, I stamped the Texas image onto white cardstock, then colored it brown using a foam ink blender tool and walnut stain brown inkpad.

This is what the image looks like when I have the first layer of brown down on the paper.

Then I used some saran wrap and crinkled it up to stamp a random pattern on top of the brown ink. I used a black inkpad for this step.

Here's the first "stamping" with my saran wrap. I just lightly pounced it back and forth from the black inkpad to my paper.

This is what it looked like once I had finished the first layer of black texture.

Then I went back over it with more brown ink and the blender tool to deepen the color a bit, then I stamped on it some more with the black inkpad and saran wrap.

I cut out the Texas shape, then cut two small pieces of tinsel to wrap around the state where the barbed wire sections were drawn.

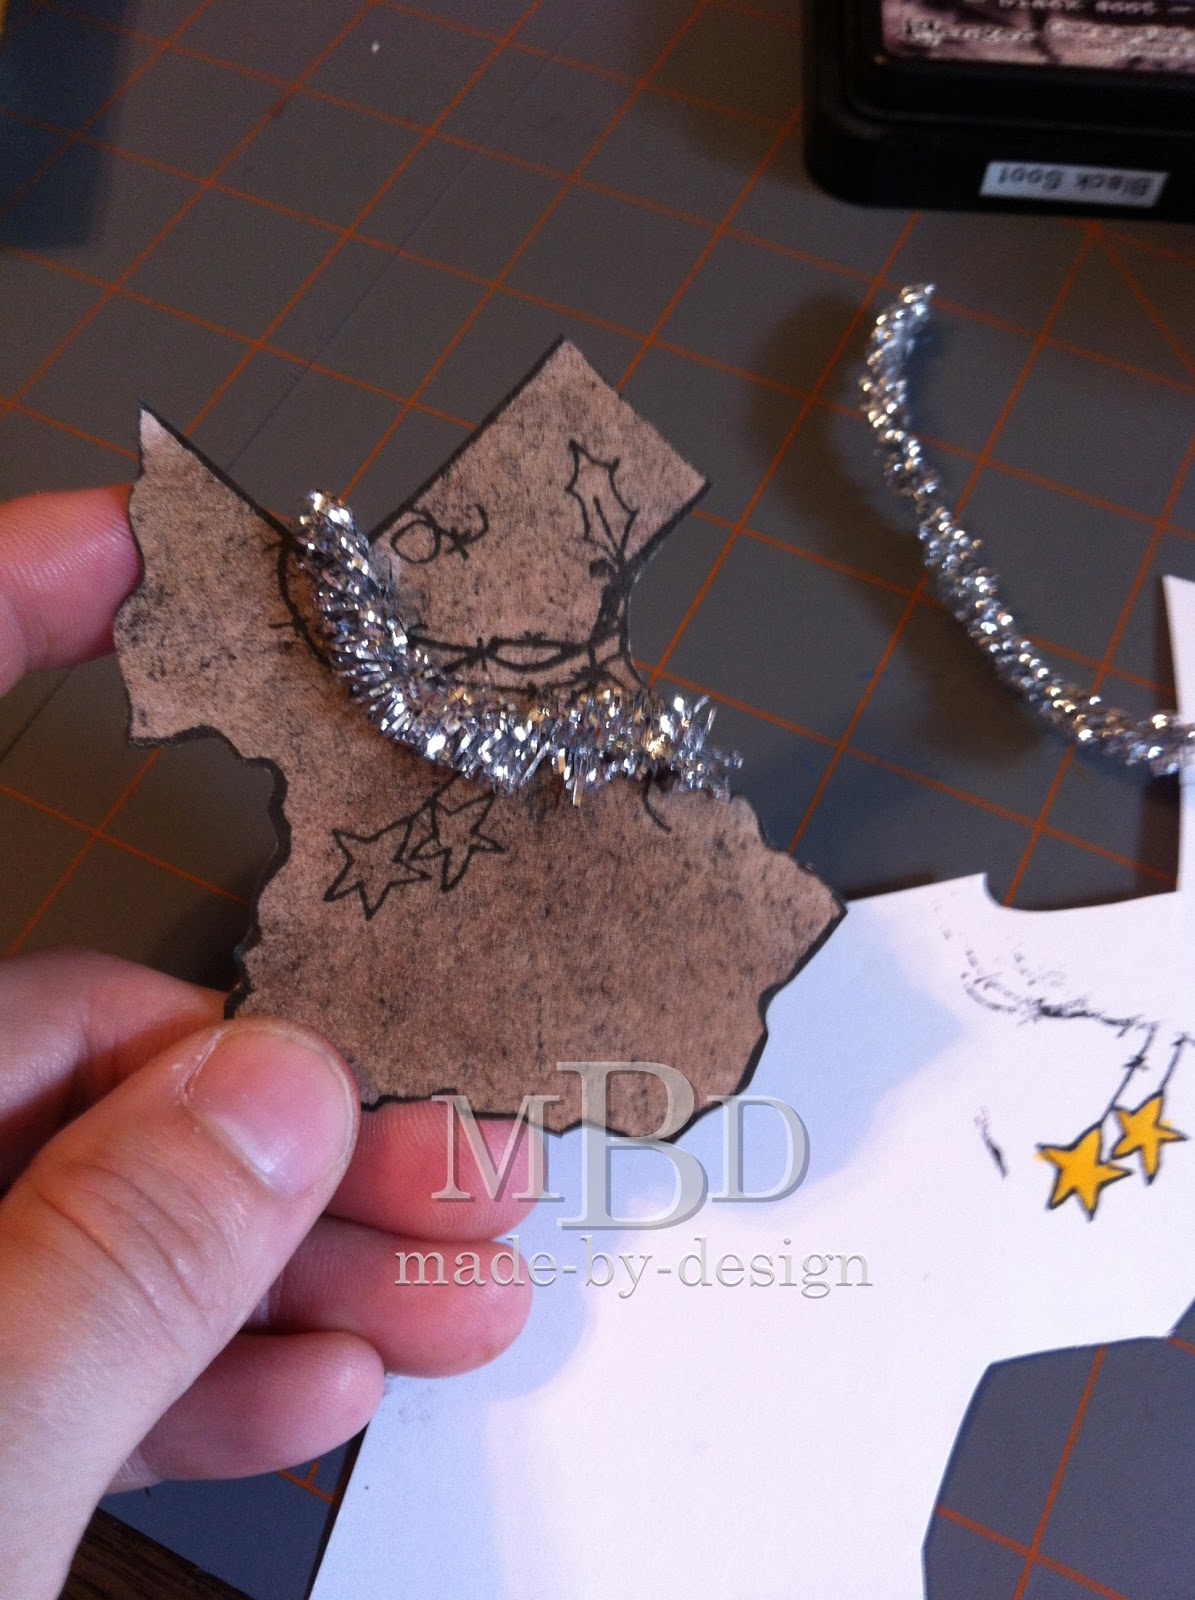
To secure the tinsel, I taped the ends to the back of the stamped image.

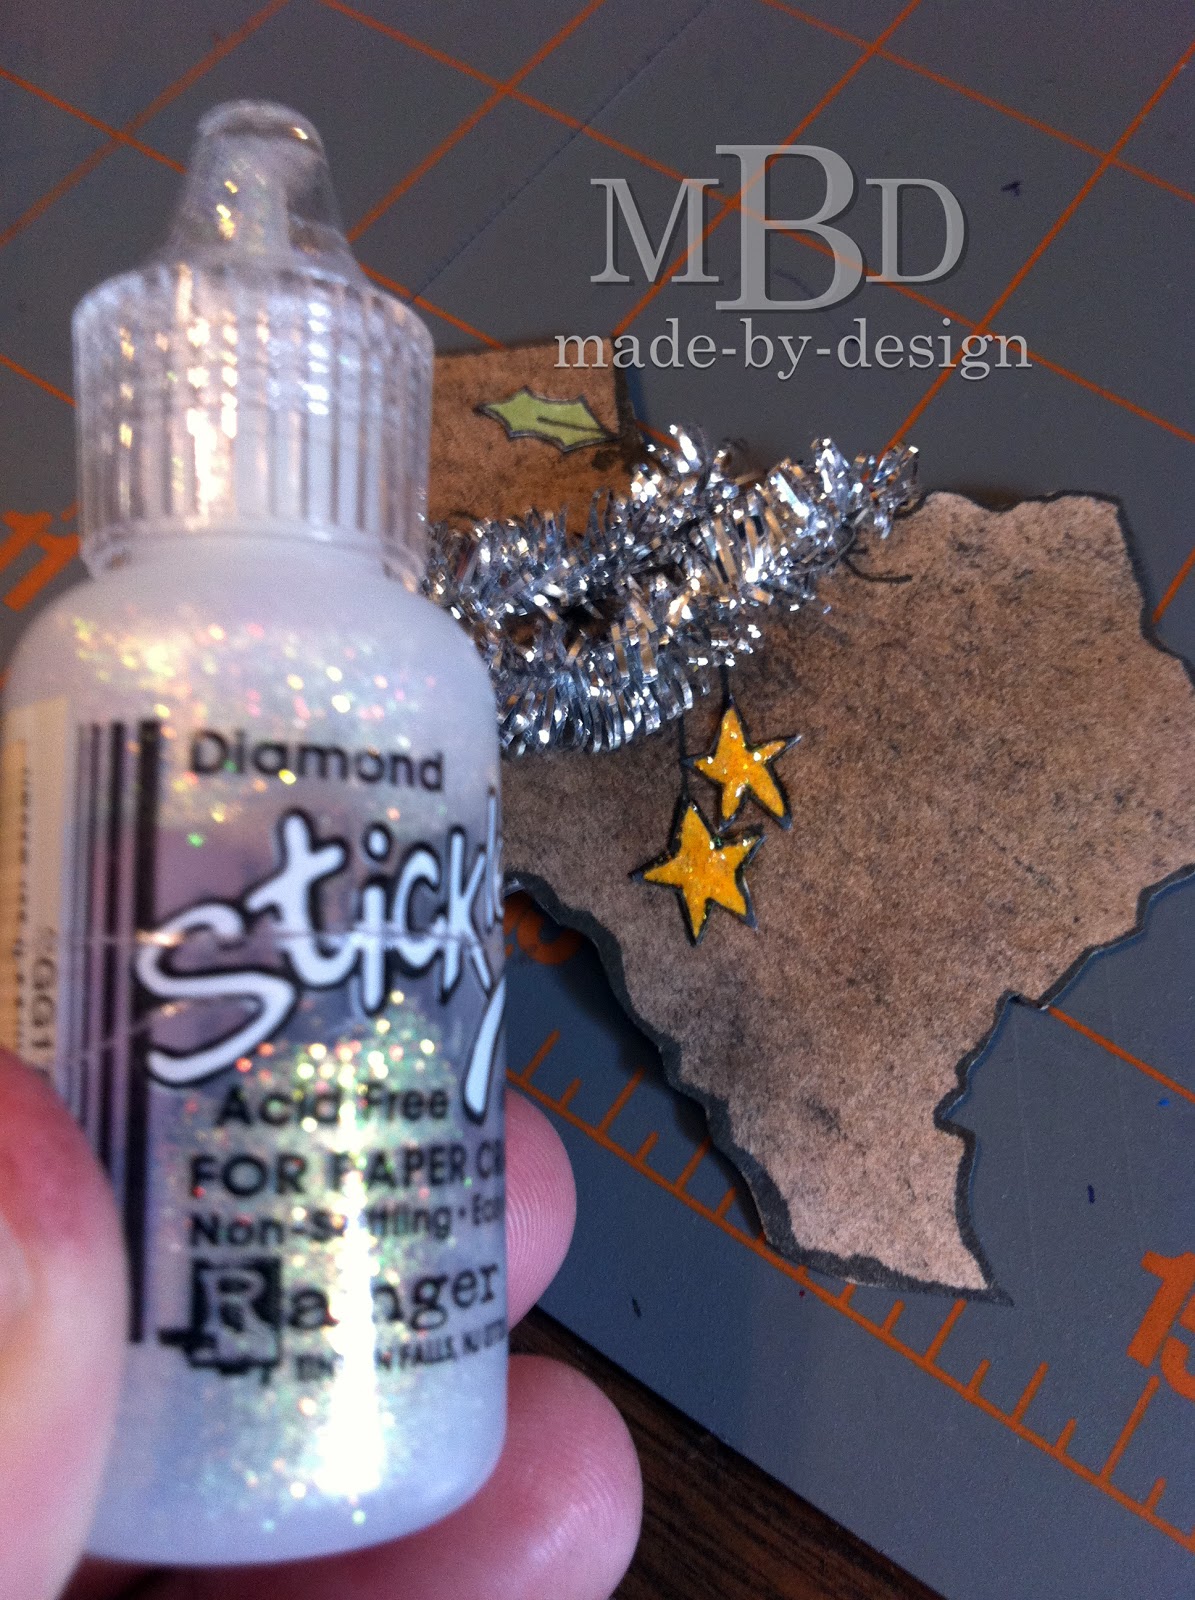
The next step was to stamp the image again on another scrap piece of white cardstock and use my copic markers to color in the leaf and stars. I cut these out with my scissors and glued them directly down to the large stamped image.

Stars just *need* some twinkle, right? So I added some diamond stickles to the stars to help them pop.

Then I added dots of red stickles to create the berries for the holly leaves.

 A few other details: I stamped the holly onto the kraft background with a lighter brown inkpad. Then I stamped the sentiment on top in black ink. The edges of the kraft cardstock were sponged with some green ink and the foam blender tool.

I die cut the label shape with my Cuttlebug and Nestabilities dies, then inked the edges with red ink and added a hand-drawn black line. The state of TX was adhered with foam tape to the label and that whole piece was glued down to the left side of the card.

Supplies Used:
Georgia Pacific: White Cardstock
DMD Inc: Kraft Cardstock
Tsukineko: Memento Inkpad (Tuxedo Black)
Ranger: Distress Inkpads (Fired Brick, Forest Moss, Brushed Corduroy, Walnut Stain, Black Soot); Foam Blending Tool; Stickles (Diamond, Candy Cane)
EK Success: Zig Writer (Black)
Copic: W3, Y17, YG63
Spellbinder Nestabilities: Labels 18
Tim Holtz: Silver Tinsel Twine
Foam Tape

Thursday, July 19, 2012

Merry Tex-Mas Snow globe card... take 2

I created this green snow globe card last year based on a card sketch by Allison Davis, and I wanted to redo the card using all Texana Designs Stamps, so I came up with this cream version and I think I like it even better!


I started by stamping the holly in various directions on the cream background paper, then I added a swirl of glue pen and some prisma glitter to the background to connect the holly stamps to where the snow globe stamp will be adhered. I stamped the holly to look like a "swirl" of Texas "snow".

Once the background was prepped, I stamped the holly images on white cardstock and cut them out and glued them on top of the stamped holly leaves. Tweezers worked great on these tiny stamped images!

For the snow globe image, I stamped it on white cardstock then colored it with my copic markers. I added dots of glitter to the snow globe image, then covered the glass part of the snow globe with glossy accents. Once it was all dried, I cut it out and used foam tape to adhere it to the card.


To finish off the card, I cut a strip of green pattern paper and wrapped some ribbon around it. This whole section was attached to the card front with my Tiny Attacher staples.


Here's the finished card all by itself:


Supplies Used:
Texana Designs Stamps: 100706S Snowglobe (Small), TX046 Holly
Cardstock: Bazzil (Red), Georgia Pacific (White)
Pattern Papers: October Afternoon (Thrift Shop), K&Co (Yellow Distress Wood Flat)
Ranger Distress Inkpads: Walnut Stain
Ranger: Diamond Stickles, Glossy Accents, Foam Blender Tool
Tsukineko: Memento Inkpad (Tuxedo Black)
Copic Markers: YG03, YG63, YG67, E31, E33, E37, W1, W3, W5, BG10, C1, R24, R29, R39
Ribbon: American Crafts
Other: Prisma Glitter, Tim Holtz Tiny Attacher
Allison Davis: Card Sketch #14

Tuesday, July 17, 2012

Hummingbird and Hibiscus card

I've been so into stamping and cutting out images lately and these cards are no exception!


I began by stamping the flower and bird image stamp onto ivory cardstock with black ink and coloring them with my copic markers. I find it so relaxing to just sit and color my images. I love the vibrant colors I get with my copic markers and I love how they blend together so well. 

Once the images were colored, I cut them out and added some rock candy stickles to the flower center and some glitter to the bird and swirls. The ivory cardstock frame was die cut with my Nestabilities dies, then I inked the edges and stamped the image with 2nd generation brown ink. I glued the cut out flower and bird images to the ivory frame on top of the brown stamped image.

The base of the card was also white cardstock that I ran through my cuttlebug with an embossing folder, then I inked the embossed image with turquoise, brown and black inkpads. I trimmed around the edge of the embossed design and mounted it on black cardstock. The ivory panel with the stamped images was mounted on top of the card base with foam tape. I used both sentiment stamps for some variety.

Supplies Used:
Texana Designs Stamps: 80815 Hummingbird/Hibiscus, TD059 Caring Thoughts, TD060 Thinking of You
Tsukineko: Memento Inkpad (Tuxedo Black)
Ranger: Distress Inkpads (Brushed Corduroy, Black Soot, Tumbled Glass, Scattered Straw); Foam Blending Tool; Distress Stickles (Rock Candy)
Nestabilities: Labels 8 Die Frame
QuicKutz: Geometric Circles Embossing Folder
Sakura: Gelly Roll Clear Glitter Pen
Martha Stewart: Glue Writing Pen
Copic Markers: Y15, Y17, Y21, R22, R24, R29, R39, BG10, BG15, B02, E31, E33, E37
Wausau: Ivory Cardstock
EK Success: Maple Lane (Black Cardstock)
WRMK: Corner Chomper 
Foam Tape
 

Monday, July 16, 2012

Cactus Frame Card

This was my very first card I created for Texana Designs as a member of their design team. It has been a busy summer and I am just now getting some of my projects posted. :)

I stamped the main cactus frame onto white cardstock and colored it with my copic markers. Once it was dry, I cut around the edges and distressed the edges with brown and black inkpads and my foam ink blending tool.

To create a sentiment for my card, I used 2nd generation stamping on part of the barbed wire image from the cactus frame stamp to give a "line" for my text to follow. I stamped the word "Texas" in black ink and wrote the word "my" in front of it. Then I trimmed the white cardstock down into a banner shape, inked the edges, and mounted it with foam tape onto some ribbon loops.
The frame image was mounted on a houndstooth print, then onto kraft cardstock. Love the rustic feel to this card with the pop of bright green!

Supplies Used:
Texana Designs Stamps: Cactus Frame, “Texas” from “Texas is a State of Mind"
Handwritten word: “my”
Ranger Distress Inkpads: Antique Linen, Walnut Stain
Black Inkpad: Marvy Matchables
White Cardstock: Georgia Pacific
Kraft Cardstock: DMD Inc
Brown Houndstooth Paper: Making Memories
EK Success: Black Zig Writer
Copic Markers: YG03, YG63, YG67, Y11, Y15,Y17, R29, E33, E37, W3, W5.
Ribbon: Bazzill Basics
Foam Tape

Thursday, July 5, 2012

Card Share: Sunflower Stamp

I love to color in stamped images and this Sunflower stamp from Texana Designs was so much fun to use. I even colored it with several different color combinations. Some were using colored pencils and gamsol (odorless mineral spirits), and others were colored with Copic markers. 

I used the stamp with a grey inkpad to create a subtle background on white cardstock, then I used my distress inkpads and a foam blending tool to color the edges of the white cardstock. I love how they looked when they were all colored!

I had so much fun coloring the images, I just had to use them in as many cards as possible.  
Here are all the finished cards using the copic markers:


 And here are the cards created with the colored pencils and gamsol:


Supplies Used:
Texana Designs Stamps: WF044 Sunflower, TD043 Thank You, TD045 Happy Birthday
Ranger Distress Inkpads: Scattered Straw, Pumice Stone, Walnut Stain
Black Inkpad: Marvy Matchables
White Cardstock: Georgia Pacific
Dark Gray Cardstock: Unknown
Pattern Paper: Scraps (MAMBI, CTMH, SEI)
Copic Markers: YG03, YG63, YG67, Y11, Y15, Y17, R20, R22, W5, E33, E37, BG10
Colored Pencils: Ek Success
Gamsol
Ribbon: May Arts, Close To My Heart
Red Gemstones: Recollections
Buttons: Craft Stash
Brown, White, Black Crochet Thread: Coats Clark
Foam Tape